How to Create a Figma Plugin to Automate Your Design Workflow

Motivation
Recently, I've started experimenting with some AI tools for product development because vibe coding and vibe design trends are popping up everywhere. I've read a lot about how AI can automate workflows, so I got curious and began exploring how I could use AI to streamline my own processes.
One day, I stumbled upon this blog post by Prototypr and felt really excited. The idea of building a Figma plugin without coding sounded great, so I decided to challenge myself and try creating one myself. Making a plugin seemed like a perfect way to automate my workflow.
Initially, I tried some tools friendlier to designers, such as Lovable and Anima, but soon I decided to challenge myself further with Cursor. This meant diving into coding, which was completely new to me. Honestly, at first, I had no idea what I was doing 😂.
I had to ask my developer colleagues for help, and if you don't have anyone to help you, hopefully this blog will be useful. I thought it would be great to document how I created my plugin, especially since it’s my first time coding something myself. If you're a designer, give it a try; it'll be fun!
Setting Up Your Plugin
Initially, I didn't know I had to start by creating a plugin package directly in Figma. Like most beginners, I jumped straight into Cursor and wrote a super long prompt, expecting everything to magically appear. Unfortunately, I wasted a lot of time trying to run the plugin because Figma couldn't read my manifest.json file 🥲 (probably due to some strange formatting Cursor generated).
So, here's the right way to start:
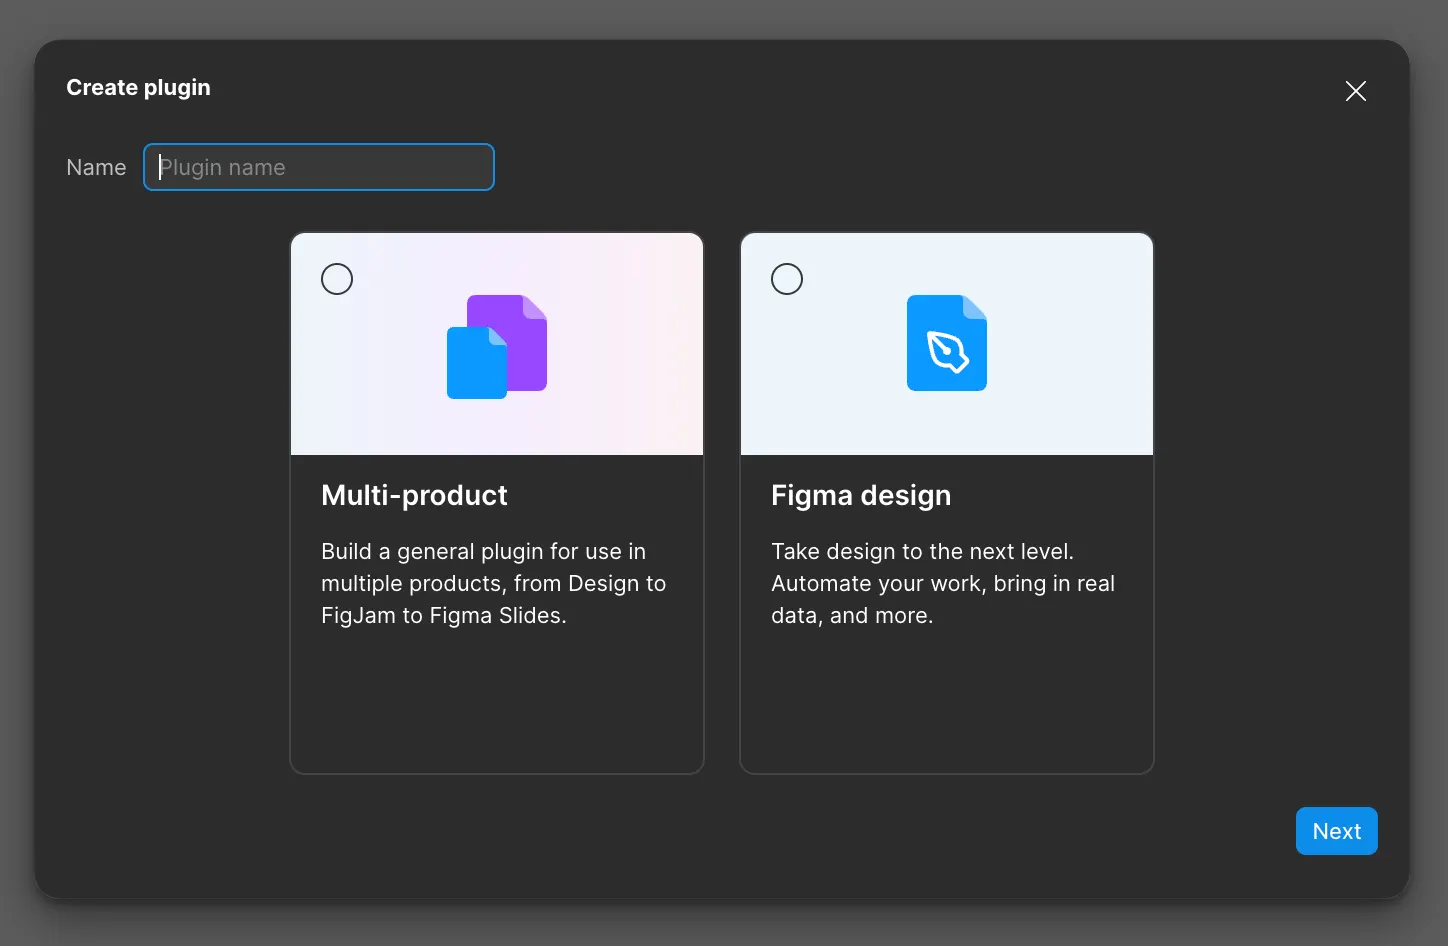
- Create a new Figma file, right-click on the main canvas, and go to Plugins > Development > New plugin.
- Figma will give you two options; name your plugin, select Figma design, and click Next.
Check out this article to better understand each file created in your plugin folder.
Coding Your Plugin
Learn First, Code Later
I chose Cursor for coding, but you can use any other tool you prefer.
Just like any learning process, it's best to understand the basics first before diving in. At first, I was so excited that I immediately jumped into writing prompts, and as a result, I burned through a lot of quota 💸 chatting with Cursor without really understanding anything.
I highly recommend reading Figma’s documentation and checking out some plugin examples. These resources will save you from many frustrating errors and help ensure your plugin works properly when submitting it to the community.
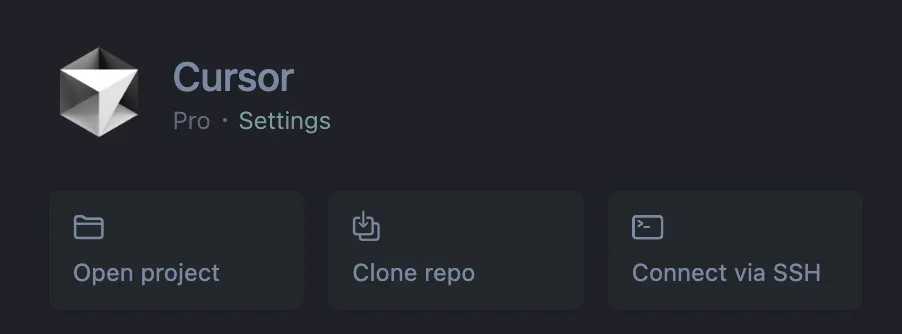
Importing Your File into Cursor
Now comes the fun part! After creating your plugin in Figma, you'll have a plugin package file. Just open Cursor, click on Open project > select your plugin folder > click Open.
Vibe Coding
My first plugin took me over 250 requests to get right, not just one simple prompt. Initially, Cursor created a basic plugin, which was okay to start. Later, I improved the design to make it look nicer and easier to use.
I divided the process into three clear steps:
Idea > Documentation > UI & Logic Coding
At first, I faced many issues because Cursor didn't fully understand my prompts. But by adjusting my prompts and providing clearer documentation, things gradually improved.
Step 1: Getting Your Idea
Clearly define the problem you're trying to solve. Ask yourself, "What issue am I facing?" For example, I struggled with calculating typography scales for headings on my web designs. So, I researched common typography ratios and asked ChatGPT to help me create a suitable prompt.
Finding a clear solution and idea is crucial, as it helps you write a more detailed and understandable prompt.
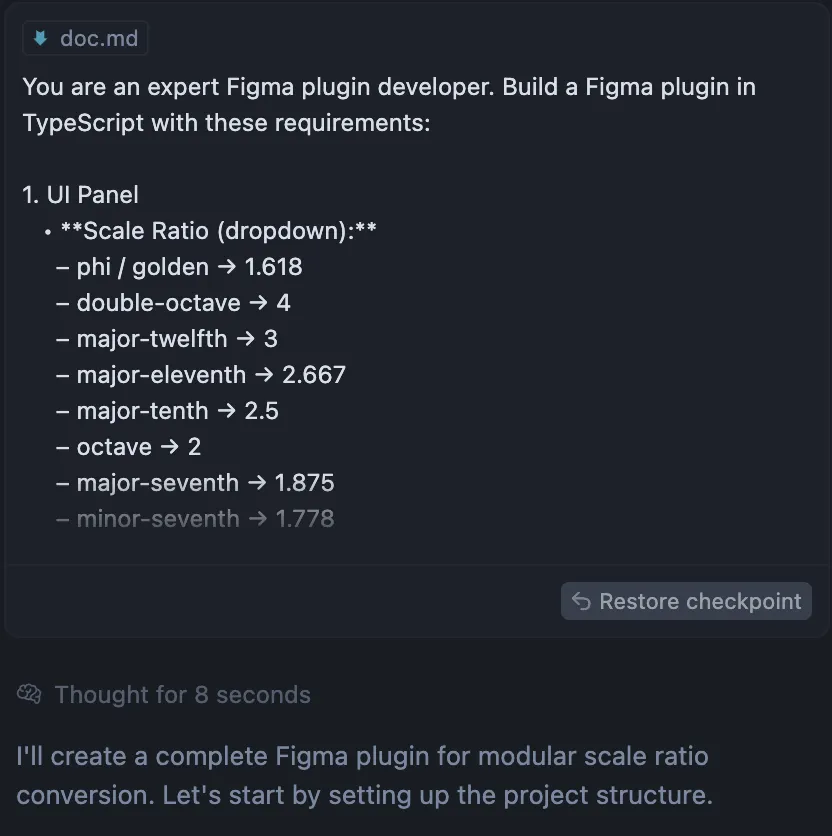
Step 2: Creating Documentation
Next, create clear documentation for Cursor. This can include explanations, formulas, and examples to clarify your plugin’s logic. Initially, I didn't provide documentation, which made Cursor confused. Once I added detailed context in a markdown file, Cursor started producing better, more accurate code.
A tip for writing documentation or prompts: ask ChatGPT to help you clearly explain your idea using simple structures like R-T-F (Role, Task, Format). Here's an example prompt: create a prompt for Cursor to generate code for a Figma plugin with [your idea].
Copy this into Cursor and watch it work its magic ✨
Step 3: Coding UI & Logic
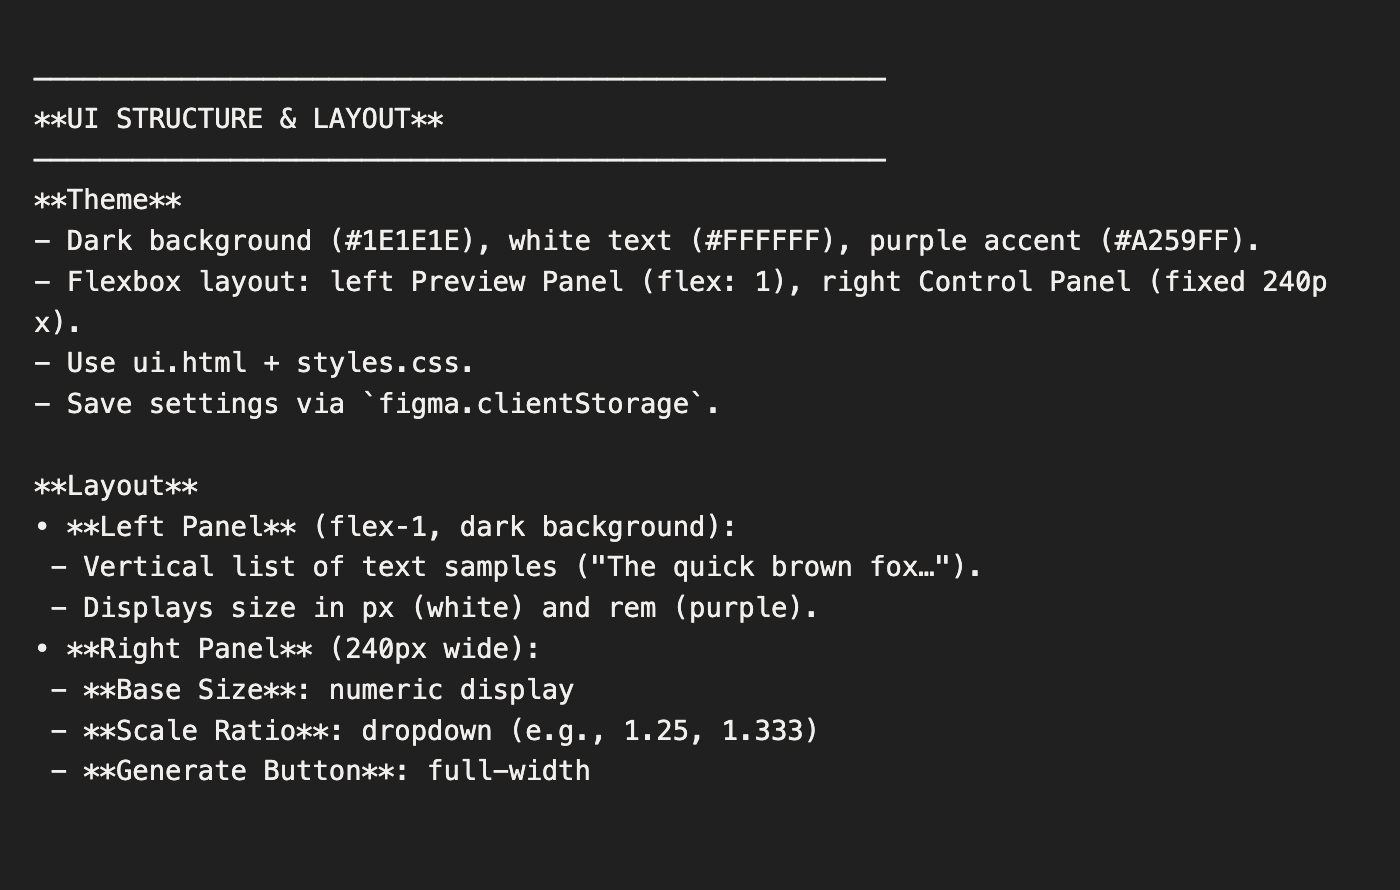
This step was the most time-consuming part for me, especially when I changed the style and layout of the plugin after having coded the logic first. Initially, the UI components stopped working completely, leaving buttons and input fields just for decoration 😭, forcing me to fix them one by one. The best approach is to plan your design clearly from the start—borrow ideas or sketch a quick demo to visualize everything before you start coding. Then, create a clear UI structure like the example below. Having a structured layout defined early on will save you a lot of time later, because then you'll only need to tweak small things like colors, padding, and typography.
Here's an example:
It might be a bit discouraging to hear this, but you'll actually need to understand the code that the AI generates. The best way to fix issues is to pinpoint exactly where the error occurs and ask the AI to correct it right there. Otherwise, you'll end up wasting many requests by having the AI review the entire code repeatedly. It can be pretty frustrating, but trust me, it's definitely worth the effort. So hang in there and be patient with your AI companion! ツ
My First Plugin That I Vibe Coded
This is the first plugin I fully created using Cursor, and it's totally free! Although there are more skilled developers out there, I'm genuinely happy it works (especially since I'm not great at coding 😂). This definitely won't be my last plugin. I hope to create more useful plugins to share with other designers.
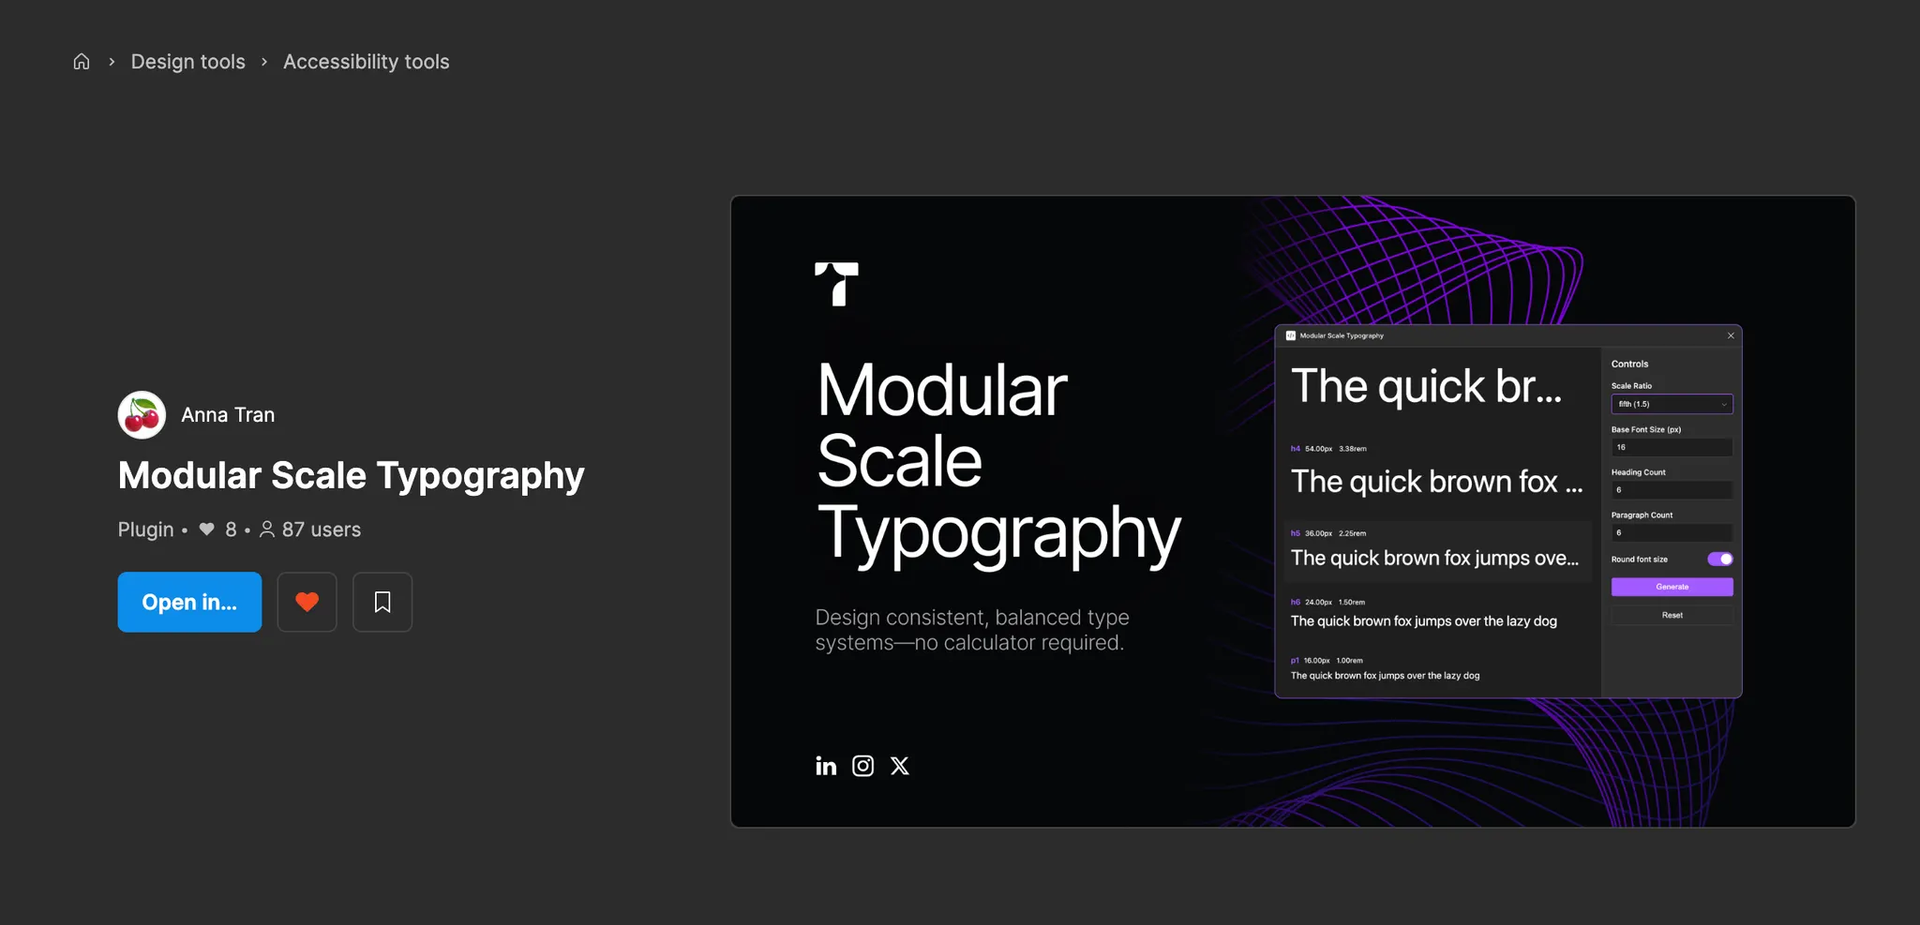
Check out the plugin here on Figma.
Further Reading
These articles helped me during the plugin development process. You might find them useful too:
How to Create a Figma Plugin to Automate Your Design Workflow (Vn)
SHARE THIS ARTICLE